chapter 1. opencvsharp 설치 및 웹캠 로딩, 이미지 파일 로딩, 동영상 파일 로딩
OpenCVShapr install - visual studio NuGet
- Windows from application으로 프로젝트를 생성.
- NuGet manager에서 opencvsharp으로 검색
- “OpenCvSharp3-AnyCPU” 설치 - version v4.0.0
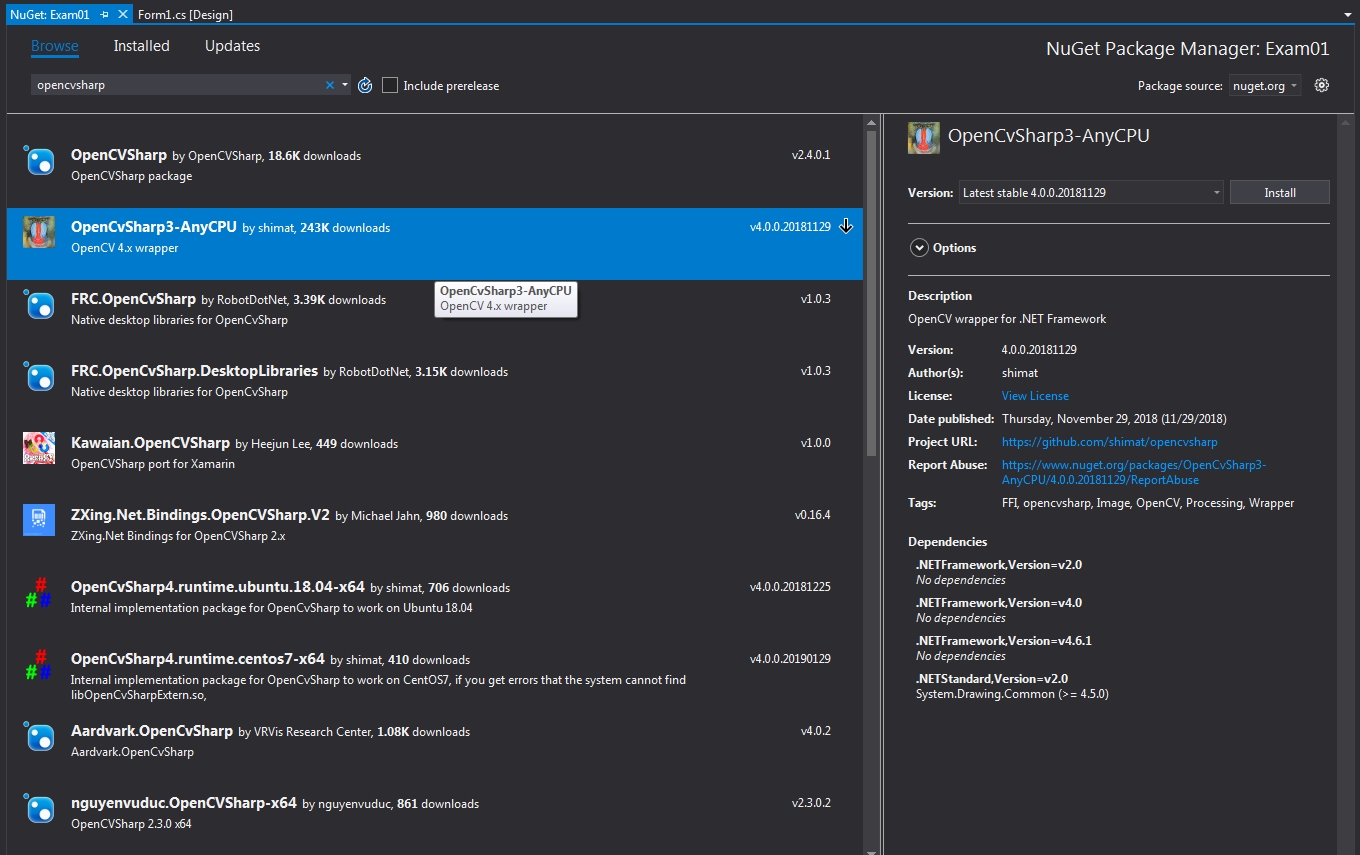
설치 확인
제대로 설치가 완료 되었다면, Visual studio -> Solution Explorer -> References에 OpenCvShapr 관련 라이브러리 들이 보일겁니다.
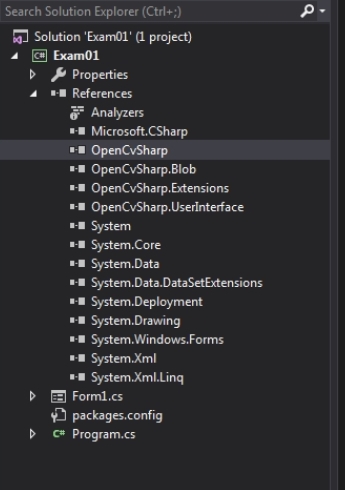
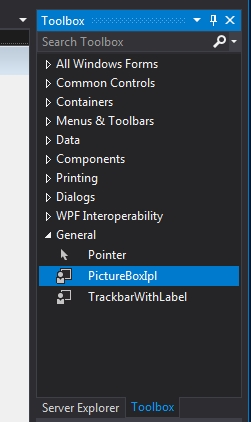
그리고 Toolbox에서 item을 선택하기로 추가 합니다.
생성된 project 폴더 하단 package 폴더에 보면 설치한 opencv폴더가 있고, 거기 하단 lib 폴더, .net 버전폴더 안에 “OpenCvShapr.UserInterface.dll” 파일을 import 하면
pictureBoxIpl 이 추가 됩니다.
Cam loading
-
먼저 메뉴 컨트롤을 추가 하여 캠로딩 메뉴를 하나 정의 합니다. 버튼으로 하셔도 되겠지요.
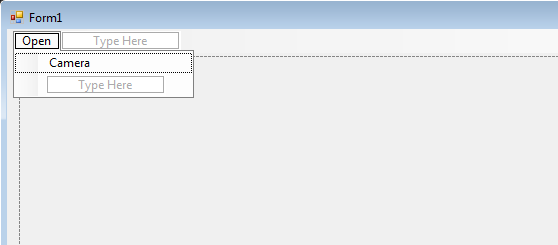
- 캠로딩 및 출력 내용
//member variables VideoCapture capture; Mat frame; Bitmap image; private Thread camera; private void CaptureCamera() { camera = new Thread(new ThreadStart(CaptureCameraCallback)); camera.Start(); } private void CaptureCameraCallback() { //variables frame = new Mat(); capture = new VideoCapture(0); //0: camera device index capture.Open(0); if (capture.IsOpened()) { while (true) { capture.Read(frame); image = BitmapConverter.ToBitmap(frame); pictureBoxIpl1.Image = image; } } } private void cameraToolStripMenuItem_Click(object sender, EventArgs e) { CaptureCamera(); } - 스레드 종료 처리
  private void CloseCamera()
  {
      try
      {
          if (camera != null && camera.IsAlive)
          {
              camera.Abort();
              capture.Release();
              frame.Release();
          }
      }
      catch (Exception e)
      {
          MessageBox.Show(e.Message);
      }
  }
Image file loading
-
image 로딩 메뉴를 추가
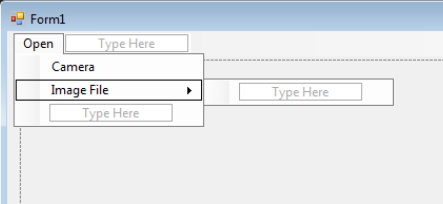
-
이미지 파일 로딩 내용
  private void imageFileToolStripMenuItem_Click(object sender, EventArgs e)
  {
      try
      {
          //open file dialog
          OpenFileDialog dlg = new OpenFileDialog();
          dlg.Filter = "Image (*.bmp; *.jpg; *.jpeg; *.png) |*.bmp; *.jpg; *.jpeg; *.png|All files (*.*)|*.*||";

          if (dlg.ShowDialog() == DialogResult.OK)
          {
              frame = new Mat(dlg.FileName, ImreadModes.AnyDepth | ImreadModes.AnyColor);
              Cv2.Resize(frame, frame, new OpenCvSharp.Size(800, 600));
              image = BitmapConverter.ToBitmap(frame);
              pictureBoxIpl1.Image = image;
          }
      }
      catch (Exception ex)
      {
          MessageBox.Show(ex.Message);
      }
  }
Video file loading
- 동영상 파일 로딩 내용
  private void videoFileToolStripMenuItem_Click(object sender, EventArgs e)
  {
      try
      {
          //open file dialog
          OpenFileDialog dlg = new OpenFileDialog();
          dlg.Filter = "Video (*.avi; *.mp4; *.mpeg) |*.avi; *.mp4; *.mpeg |All files (*.*)|*.*||";

          if (dlg.ShowDialog() == DialogResult.OK)
          {
              capture = new VideoCapture(dlg.FileName);
              int sleepTime = (int)Math.Round(1000 / capture.Fps);

              frame = new Mat();

              //when the movie playback reaches end, mat.data becomes NULL
              while (true)
              {
                  capture.Read(frame);
                  if (frame.Empty()) break;

                  image = BitmapConverter.ToBitmap(frame);
                  pictureBoxIpl1.Image = image;
                  Cv2.WaitKey(sleepTime);
              }
          }
      }
      catch (Exception ex)
      {
          MessageBox.Show(ex.Message);
      }
  }
이상 기본 설치 및 로딩 관련 내용을 마침.
Leave a comment